Disclosure: Some of the links below are affiliate links. This means that we get paid if you happen to purchase goods or services from the link. Each and every thing that we are linking to here is something that we have used on either this site or another one that we have worked on, and we stand behind that recommendation.
Are you someone that loves to cook and is always sharing your creations with friends and family? Do you have a long list of people that are always asking you for a copy of your recipes? Do you find yourself looking at many food blogs, and thinking to yourself, “Gee, I think I could do this!”. If you answered yes to any of these, food blogging may just be for you. And with this guide, you will learn how to start a food blog in no time at all.
Step 1: Setting up your new food blog
Have you already though about what you want to call your blog? I had an idea for a name and did much brainstorming around it. Thought about it for a bit more and wrote a list of names that just might work, put them in the order that we liked them, with the winner finally being SparklesOfYum.com.
Now, it’s not 100% about the name, it is also about the concept of your blog. There are already many, many food blogs out there. You are going to need to do something to set yourself apart from all of them in order to make a name for yourself. Are you going to focus on baking without sugar? Maybe vegan freezer cooking is your thing? The only real limit is; “What do you like to eat?”.
Once you have decided on the name of your blog, jump over to HostGator and click any of the “Sign Up Now!” buttons, although we recommend starting off with with “Basic Plan”. (Using our link to HostGator will also get you up to 60% off the normal price that they charge!)
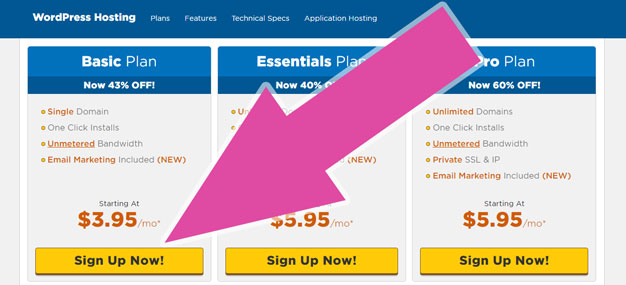
So what is hosting anyways? Hosting is pretty much renting space from a company to get your site and everything it needs onto the internet. And when it comes to hosting, HostGator is one of biggest hosting services worldwide, and it just so happens to be the company that hosts Sparkles of Yum.

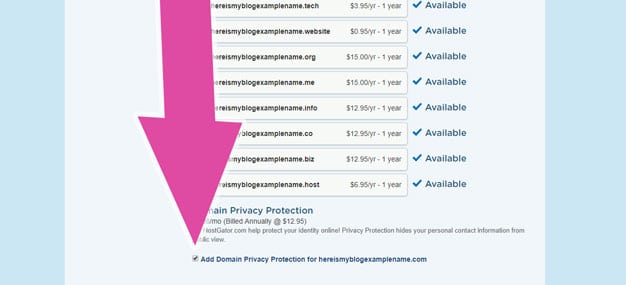
Next, check if your domain name is available, if not try another name from your list until you get one that has not been taken yet. (Adding a domain name to your hosting plan with HostGator runs $15 per year. There are ways to get your domain name for less, but that is best left for another guide, as there are extra steps involved with getting things set up properly.)
Once you have picked a name that is available, you will see a section labeled “Domain Privacy Protection”. We personally recommend leaving this checked.
If you uncheck this box and register your name, you can expect to be bombarded with phone calls and junk mail from people who want to take your money. We made this mistake before, and do not want anyone else to have to go through that nightmare.
The section for additional services is nice as well. With this feel free to pick and choose any that you want, or none at all.
That about does it for the first step on setting up your new blog! Pretty easy right?
Step 2: Getting WordPress installed
The next step you must go through in order to start a food blog is to install WordPress. There are a few steps, and it may look complicated, but it really isn’t. Also, in case you did not know, WordPress is the software that runs pretty much every blog that is out there, this one included.
So let’s dive in. First, you will need to login to your HostGator control panel. This is one of the links that you received in an e-mail after registering your site. If will look something like: https://gator1234.hostgator.com:2083, your numbers are probably different though.
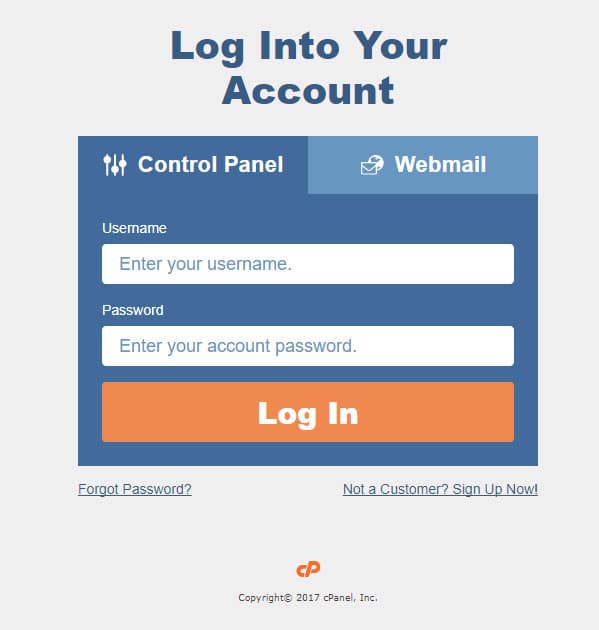
Your username and password should be in the same email. Go ahead and enter those and click the “Log In” button.
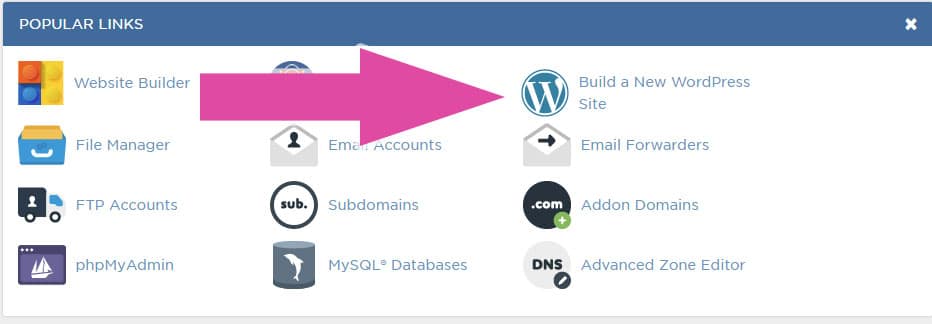
Once you are successfully logged in, you will see the screen in the image below, you are wanting to click the icon labeled “Build a New WordPress Site”.
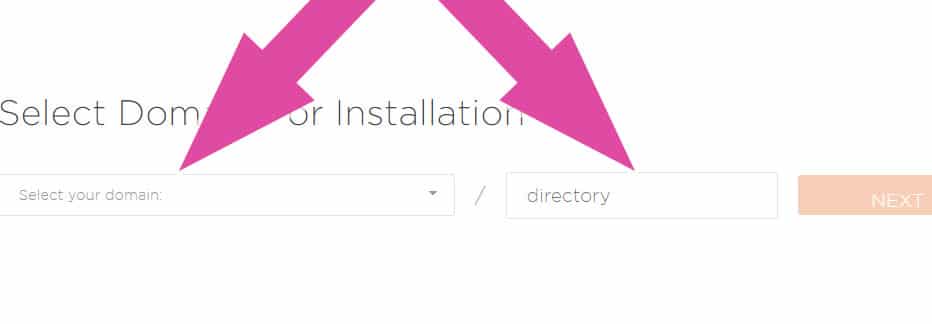
On the next page, we will be focusing on two different boxes. The first one is a drop-down box that says “Select your domain”, and that is exactly what you need to do…pick your domain name from the list. The other box is labeled “directory”, you do not need to do anything with this box. So, once you have your domain named selected, click the “Next” button on the right.
Once you arrive on the next page, there is even more boxes that you will need to fill out. Do not fret, there is nothing difficult here. Each of the boxes is fairly self-explanatory. Blog title…well that the name of your blog. Admin user is the account name for your main account on your blog. Many people make this their first name, a nickname, or anything you want really. First and last name, again, self explanatory.
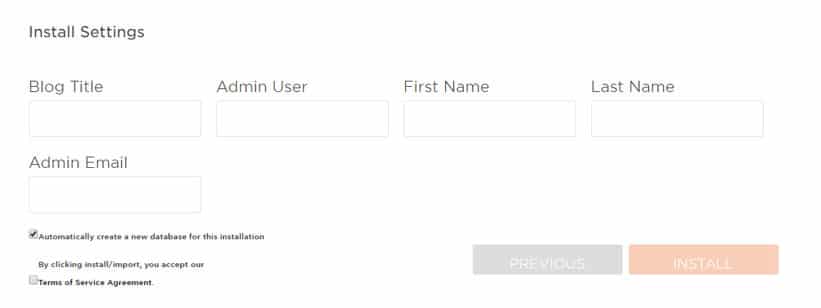
The admin email box needs to be an e-mail address that you can check. After WordPress is done installing, you will get an e-mail with all the links you need. You will also be leaving the “Automatically create a new database for this installation” box checked, and make sure you check the “Terms of Service Agreement” box. When everything looks correct, click the “INSTALL” button and wait just a minute or two.
If everything went well, and really there is no reason why it shouldn’t, you should get a message saying “Installation complete!”. You will also have a few things here:

Installed to: This is the address to front page for your blog.
Username: This is the admin username that you picked earlier. You will need this for the next step.
Password: This is an auto-generated password for the admin account. If you do not like it, you can change it very soon.
And the “LOGIN” button. This will take you to the admin section for your blog. The admin section is where you will write all of your posts and do other things too. Things like setting up new looks for your blog and checking how many visitors you are getting.
So go ahead and click “LOGIN”. On the next screen you will see a login box. Go ahead and use the username and password you were given on the previous screen.
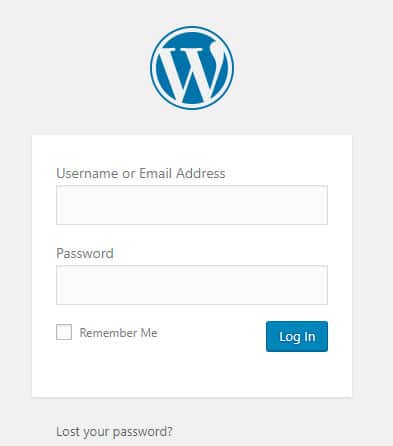
CONGRATULATIONS!!! You just installed WordPress, and successfully set up your very own blog! That wasn’t too hard, was it? But we are not done yet…
Sparkles of Yum is a participant in the Amazon Services LLC Associates Program, an affiliate advertising program designed to provide a means for sites to earn advertising fees by advertising and linking to Amazon.com.
Step 3: Making your new blog look good
If you peak at the front of your blog (we will wait while you do that), you will notice that it looks just…OK. Not too bad, but definitely not great. You are going to want a look that makes your photos and words stand out. Something that makes reading your blog just that much more enjoyable.
This is where themes come in to play. Themes are basically a skin that you can place on your blog. It will determine how everything is laid out, and how people will interact with your blog when they visit it. It is one of those things that again sounds difficult, but really is not too hard to apply to any blog.
There are literally thousands of free themes that you can get, but if you want the best, you will need a premium theme. Premium themes usually give you more options to customize your blog and get more updates than free themes. These updates are important when it comes to keeping things looking and running their best, and keeping your blog secure.
Popular Premium WordPress Themes
1. Genesis Framework – This is a mega popular theme among food blogs. When you think of some of the most popular food blogs that exist, odds are they are running some version of this theme. The same company that makes the Genesis Framework also offers other themes that can be found on the Studiopress Themes page. If you are going to check those out, be sure to look at the Foodie Pro Theme, which has been custom built just for food bloggers.
2. Elegant Themes – Just as their name implies, Elegant Themes provides many (wait for it)…elegant themes. Be sure to give them a look. They also offer many plugins that can make your blog even better.
3. Cyber Chimps – Although they do not have themes designed specifically for food blogs, they do have lots of really great looking themes that may just be what you are looking for.
Logo Design For Your New Blog
Many bloggers put a lot of time into coming up with their perfect logo design. Although I believe it is not the most important thing when you are trying to start a food blog, many people have a hard time being convinced.
If you are one of those people, I suggest first coming up with your idea. You can then sketch it in Paint, Canva, Pic Monkey, or something similar. You can then use a site like fiverr or even Facebook to find someone to design a finished version for you. Many of these folks are very talented, and you can sometimes get it done for less than $5.
When it is time to add your new logo to your site, you will have to check within your theme’s options, as this really does vary between them all.
Install Essential Plugins and Tools Needed For Your New Blog
Between WordPress and the theme that you choose to go with, you have almost everything you need to start your food blog. There are however some plugins and and tools you really should think about adding to your blog before writing that first recipe.
Akismet (Free) – This plugin comes with your WordPress installation, and really should be one of the first that you set up. Nobody likes spam, and this handy little tool will keep it from flooding the comment section of your blog.
Jetpack by WordPress (Free) – Another plugin that comes with your WordPress installation. Actually, this is like 20 plugins in one. There is so many things that Jetpack does. From telling you how many visitors you are getting, to making your images load faster. This really should be the second plugin that you setup when building your blog.
Yummly Rich Recipe (Free) – This handy plugin makes it easy to get your recipe in the right format. After you enter your ingredients and instructions, you get a great looking recipe on your site. It formats your recipe so that Google can read it properly (bringing you more visitors) and makes it easier to share your recipes on Yummly (again, more visitors).
Limit Login Attempts (Free) – This is plugin is important to keep your blog from being hacked. There are many bots that will try to hack your blog, and this will help to stop them.
WP Fastest Cache (Free) – This plugin helps to speed your site up. It does some thing in the background that will keep things loading quick for your visitors. A few things within the plugin need to be activated after you install it, but it is very straight forward. There is also a premium version of this plugin, but the free one is plenty good for a new blog.
Yoast SEO (Free) – SEO stands for “Search Engine Optimization”. If you want your site to be found on Google, Bing, Yahoo, and others; this is something that you will need. This plugin goes a long way in helping your blog be found.
Your Just Managed To Start A Food Blog!
I know this was a lot to take in. And there is still so many other things to cover. I will be coming back and adding to this post very shortly to give you even more tips and tricks on how to get your food blog going even better.
If you used this guide to make a site, let me know in the comments. I would love to see what you have created. I would also like to hear from you if you have an questions.
Sparkles of Yum is a participant in the Amazon Services LLC Associates Program, an affiliate advertising program designed to provide a means for sites to earn advertising fees by advertising and linking to Amazon.com.
